Naturally Clear: Herbal Remedies For Acne
- 13 Apr - 19 Apr, 2024
Soft glam or full on bombshell – take your pick of the exciting looks you can create this Christmas. Whether you are planning to spend the holidays with your family, colleagues or the person you love, you are going to need a nice holiday makeover. Don’t hold back on the sparkle and get in the holiday spirit the right way!
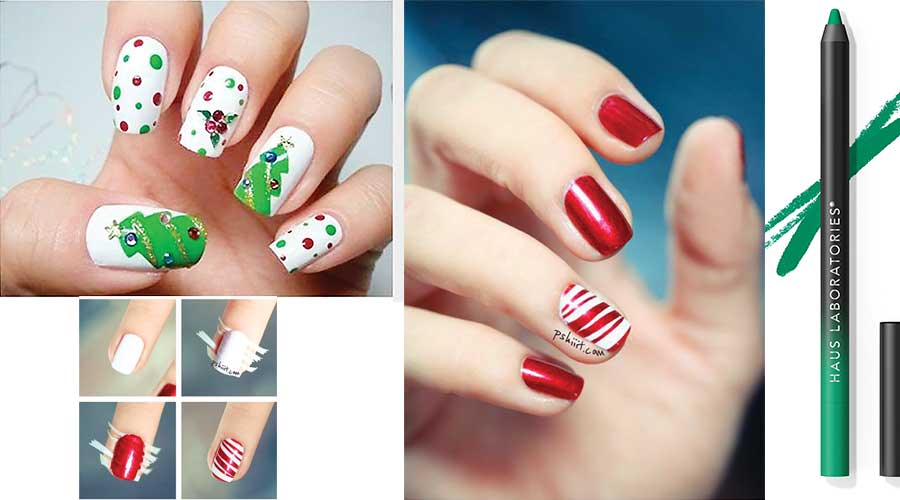
Two patterns are depicted here. For the first one, you need to draw some very basic polka dots. For the Christmas tree, draw three overlapping triangles arranged vertically.
Fill in the colour and then decorate your nail art using glitter and studs. To achieve this look with precision and ease, use a pair of tweezers and adhesive.
This nail art is perhaps the easiest to do and it looks fancy, too! All you need is a white and red nail colour and some tape and a pair of scissors.
Coat you nails with the white colour first and make sure they are absolutely dry before you proceed to the next step. Cut strips of the tape to the thickness of your choice and place them diagonally on your nails.
Coat the red nail colour on top. Make sure your nails are dry before ou gently pull away the trips of tape, and you’re done!

Start with an eyeshadow primer. Apply a tiny bit of product on your eyelid and gently spread it all over the lid with a ring finger. Let the primer to absorb and slightly powder it with translucent powder or matte eyeshadow, close to skin colour. Primer will help your look to last all day and night long, making the colours appear brighter.
Next, apply matte light brown eyeshadow on the crease, softly blending it with a fluffy blending brush. This will define your crease and intensify the overall look. Highlight the area under the brow bone with pearly white highlighter. You can also add the highlighter on the inner corners of your eyes.
Moving to the best part of the look – dramatic white eyeliner. Use a longlasting white eyeliner to draw the wing on the lid. To make the wing extra sharp and neat, you can use tape. On top of that wing, you will make diagonal lines, angles outwards and evenly spaced, with a red liner. For best results, use a matte liquid lipstick to draw the wing on the lid. On the top of the cranberry red lines, apply a little bit of eye lash glue so that the glitter can stick on the skin and last longer.
Final touch – sparkling glitter goes on the glue! Use a fine eyeliner brush to apply red glitter on the diagonal lines and swipe away the fall outs with a fan brush. Apply white pencil on the top and bottom waterlines to open up your eyes.
Finish the look by curling your lashes and applying few generous coats of volumising and lash-defining black mascara. If you feel, that mascara is not enough and you need even more drama, add a pair of false lashes. Don't forget to seal the deal with a makeup setting spray and make the glitter on your eyes last even longer. Use an intense berry lipstick to complete the look.
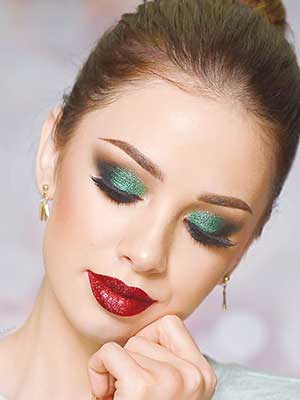
Prep your eyes with your favourite primer, you will need a long lasting one for this look. And start by softly blending a taupe shade under your brow bone to give your eyes definition. This will also serve as a transition shade for the smoke.
Underneath it, use a darker, milk-chocolate brown and blend it to perfection. The idea is to keep going darker as we move towards the lid. Use a charcoal black on the outer corner of your lids and blend it outwards to mix in with the darker brown shade.
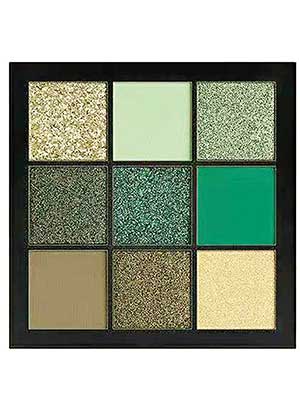
On the main lid, you will use a pigmented Christmas-tree green shade going all the way from where the black shade starts to the inner lid. Don’t forget to blend the green and black shades, there should be no sharp lines.
Right on top of the green shade, you will apply a sparkly glitter shade matching the green colour. To finish the lower lash line, apply the dark brown underneath the lashes first then the green shade right above it to soften up the look.
To match the glitz on the lips, line them with a bold red liner and fill them in with a matching bold red lipstick. Use a flat brush to stick wet glitter on the lips in the matching shade.
Apply pearl white highlighter on the tear ducts and a white eye liner on the water line. Since we are going all out glam on this, get your false lashes out!

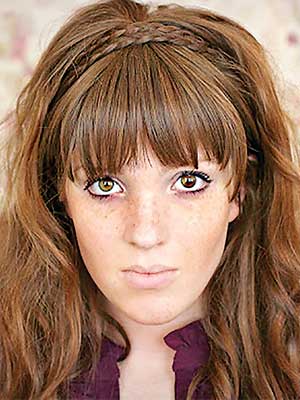
Draw a line with your finger upwards right above your ear and split your hair in half. Take a chunk of hair in a circle about as thick as you want your braid to be from just behind your ear and braid it up!
Pull the braid over to the other side of your head and secure right above your ear with a bobby pin or two. Repeat the process in step 1 on the other side of your head, remembering to take the clump of hair from behind your ear, laying it next to the other braid as you pin it on the other side of your head.
Tease your hair a bit in the back for more volume if you like, straighten a little, or finish off with a few freshly curled locks, and you're good to go!
Curl your hair first so your front section has volume. You can also use a volumizing product for this if you like. How big you want the section to be, totally depends on you. You want to pull the top section of hair up to the crown of your head. To do so, place your fingers just above your ears and swoop them up to your crown, effectively dividing your hair. Before tying this section into a half-up ponytail, use your comb to smooth out any bumps and lumps from your hairline back to your baby ponytail. Once everything looks super-smooth, it’s time to tie it off.
Next, split your ponytail into three strands and weave to the ends. Instead of tying your ends off with an elastic, gently fluff it up to make for a more voluminous top knot and immediately twist your braid around itself and pin it in place in the back to keep the bobby pin out of sight.
To make your look last longer and to get rid of any baby hair standing out, use a bit of hair spray on a comb and gently comb back the hair.
This look is all about texture and volume, so you need to determine f your hair can pull it off. If you’re creating this effortless messy ponytail hairstyle with clean hair, spray some of your onto damp hair. If, on the other hand, you’re rocking this style with a day two ‘do, reach for a can of dry shampoo. Whichever option you choose, be sure to evenly disperse the spray between each layer of your hair for optimal texture and volume.
Once your hair has dried, take note of your roots. How do they look? Do they look full-bodied, or do they need a little lift? If you resonate with the latter, use a fine-tooth rattail comb to gently the hair beneath the top layer from your hairline back to your crown. This extra textured layer will help bring your voluminous look to life.
Next, it’s time to add a little extra texture to your mid-lengths and ends. Instead of using the same spray you began with, reach for a bottle of texturizing hair spray. It will cling to your strands to create slight separation while boosting overall grit.
Once your hair is perfectly textured, use your hands to gently pull your hair back into a ponytail at the level of your choice. A mid-height pony just below the crown of your head would look lovely! When your placement is just right, tie it off with a hair tie. Be sure not to wrap your elastic too tight, as you want to be able to pull a few pieces free before completing your look. Effortless messy ponytails look their best with a few purposeful fly-aways. Gently tug a few strands out around your hairline to really embrace that lived-in, undone look. Choose a fancy pony of our choice and place it on top of the elastic or take a thin section of hair from your ponytail and wrap it around your ponytail. – S.K


COMMENTS