Naturally Clear: Herbal Remedies For Acne
- 13 Apr - 19 Apr, 2024
Ready your red lipstick and bust out your inkiest eyeliner: we're going to show you how to create a classic 1950s retro makeup look with a 21st-century twist.
Television and film reigned supreme in the 1950s, and movie stars like Grace Kelly, Audrey Hepburn, Elizabeth Taylor, Sophia Loren, and Marilyn Monroe became beauty icons. Their makeup styles brought powder-soft skin, rosy cheeks, cat eyes, and flushed lips to the masses through the silver screen.
Fashion and makeup trends come and go, but if you ask us, the classic ‘50s makeup look never went out of style. The makeup tutorial we're about to show you lives at the intersection of old Hollywood glam and today's bold, dare-to-be-different mentality. Grab your favourite snacks and get ready to rewind.
Apply moisturiser and give it a few minutes to soak all the way in before smoothing or spraying on your primer.
Conceal under your eyes and any blemishes if you need to, then apply your foundation. Use a brush for more coverage or a damp makeup sponge for less. To keep this look from feeling heavy, start with less foundation than you think you need and blend it out well before taking a second pass at any areas that need a little extra attention.
Mattify and set your foundation by dusting translucent powder all over your face with a fluffy brush. You can also stipple the powder on with a makeup sponge or dense brush to bake your under-eye concealer. (Note: if you're using a liquid or cream blush, setting powder should be your very last step, otherwise the texture will get wonky.)
Vintage makeup trends treat blush and contour as one and the same. Use a blush brush or contour brush to punch up the apples and hollows of your cheeks.
Your eyeshadow primer will keep your cat-eye from fading or smudging as the hours go by. Let it set for a minute before you line your eyes, starting about a third of the way in from the outer corners. Take your chosen eyeliner and make a line from the inner corner of your eye. Pull along in a smooth motion towards the end. Pull your eye taut to achieve a smooth line and curve the angle to create the wing. Fill in any gaps using small strokes. If you make a mistake, all is not lost – a clean angled brush and some concealer make for a great corrector!
Use an eyelash curler to get some extra lift and body before coating both sides of your lashes in mascara. To do this, close one eye and gently wiggle the mascara wand through your top lashes, then open your eye and run the wand through your top lashes again from base to tip. Lightly coat your lower lashes, then repeat on your other eye.
Use the tip of a lip brush to draw on the borders of your lips, then use the flat side to blot on the lip color. Rub your lips together to blend and then blot with a tissue if necessary to remove shine.
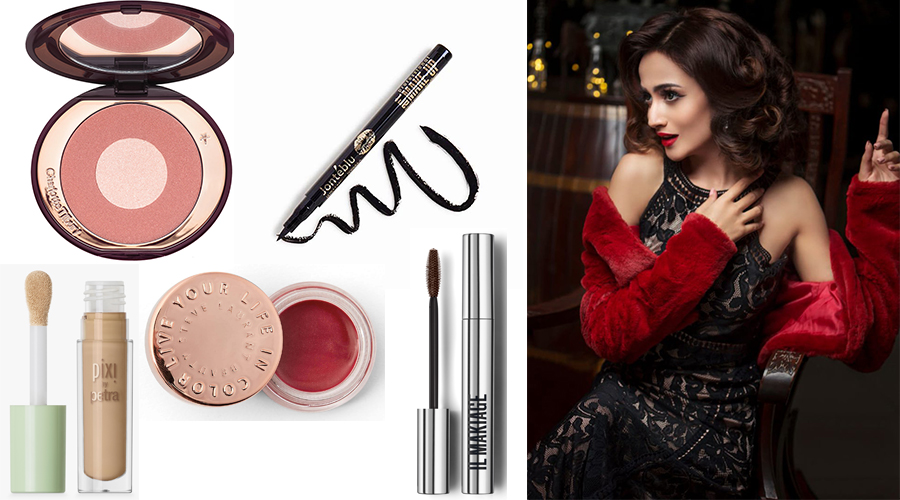
While the look might be vintage-inspired, you'll need a few modern makeup products to get started:
• Mattifying primer – MAC Prep + Prime Fix + Matte Spray.
• Matte foundation – Catrice Cosmetics HD Liquid Coverage Foundation
• Concealer (optional) –
Pixi By Petra Pat Away Concealing Base
• Translucent setting powder – Ciate London Extraordinary Translucent Setting Powder Loose
• Light nude blush – Charlotte Tilbury Cheek To Chic Pillow Talk Blusher
• Eye primer – Estee Lauder Double Wear Stay-in-Place EyeShadow Base
• Liquid eyeliner – Jonteblu Felt Tip Eyeliner Pencil
• Lengthening mascara – Il Makiage Icon Mascara
• Bright red lip colour – Steve Laurant Beauty Cherry Lip Tint


COMMENTS